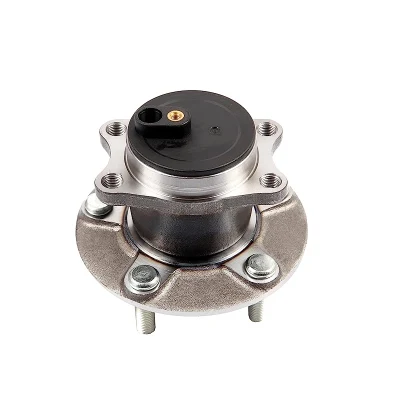
Before we dive into the step-by-step guide, let's briefly cover the basics of a wheel bearing hub assembly. This vital component is responsible for enabling the wheels to rotate smoothly while supporting the vehicle's weight. Over time, the wheel bearing hub assembly may wear out, leading to various symptoms such as unusual noises, vibrations, or uneven tire wear. When these signs occur, it is crucial to address the issue promptly to ensure the safety and performance of your vehicle.
Now, let's move on to the expert guide for replacing your wheel bearing hub assembly with ease. We have compiled top tips to make this process as straightforward as possible.
1. Gather the necessary tools and equipment: Before starting the replacement process, it is essential to have the right tools and equipment on hand. Some of the key items you will need include a lug wrench, jack stands, a torque wrench, and the replacement wheel bearing hub assembly.
2. Secure the vehicle: Park your vehicle on a flat surface and engage the parking brake to prevent any movement. Use the lug wrench to loosen the lug nuts on the wheel that requires the wheel bearing hub assembly replacement.
3. Lift the vehicle: Safely lift the vehicle using a jack and secure it with jack stands. This step is crucial for ensuring a stable and secure working environment while replacing the wheel bearing hub assembly.
4. Remove the old wheel bearing hub assembly: Once the vehicle is securely lifted, remove the lug nuts and the wheel to access the wheel bearing hub assembly. Depending on the type of vehicle, you may need to remove the brake caliper and rotor to reach the wheel bearing hub assembly. Carefully follow the manufacturer's guidelines for your specific vehicle.
5. Install the new wheel bearing hub assembly: With the old assembly removed, carefully install the new wheel bearing hub assembly. Make sure to follow the recommended torque specifications and use a torque wrench to tighten the bolts to the correct settings.
6. Reassemble the components: Once the new wheel bearing hub assembly is in place, reassemble the brake caliper, rotor, and wheel. Double-check all the connections and mounting bolts to ensure everything is properly secured.
7. Lower the vehicle and test: Carefully lower the vehicle from the jack stands and remove the jack. Tighten the lug nuts to the specified torque settings and test the wheel bearing hub assembly by taking the vehicle for a brief drive. Pay attention to any unusual noises or vibrations, which may indicate improper installation.
By following these expert tips, you can effectively replace your wheel bearing hub assembly with ease and ensure the continued safety and performance of your vehicle. Remember that proper installation and maintenance of the wheel bearing hub assembly are essential for the smooth operation of your vehicle.
In conclusion, the wheel bearing hub assembly is a critical component of your vehicle's drivetrain, and replacing it with ease requires the right knowledge, tools, and attention to detail. As a leading manufacturer of bearings, we are dedicated to providing you with the expert guidance and top tips for maintaining and replacing this essential part of your vehicle. Whether you are a professional mechanic or a DIY enthusiast, we hope that this guide has equipped you with the necessary information to tackle this task with confidence.
